A Dockerfile in Portainer refers to a script that contains all the commands, in order, needed to build a Docker image. A Docker image is a pre-configured environment that includes all the necessary software and tools to run a specific application or process.
In Portainer, you can use a Dockerfile to build and deploy a custom image for your containers. You can either create a new Dockerfile from scratch or use an existing one that has been shared by someone else. You can also edit an existing Dockerfile if you need to make modifications to the image.
Once you have created your Dockerfile, you can build the image using the Portainer UI, and then use the image to launch software containers as needed. This allows you to easily deploy applications or services with a consistent and reproducible environment, without having to manually set up each container.
This guide explains how to use a dockerfie in Portainer. We will use an example of a portainer dockerfile that converts a static website to a docker image for containerization. The process involves creating the environment the website needs to run inside the container.
Related Resources #
- Udemy Course – Software Containerization with Docker and Portainer.
- How to create a cloud account with a fixed $5 monthly charge.
- Python Flask Example with Portainer.
- How to Install Docker Compose in Ubuntu Linux.
- YAML : A powerful Data serialization language
After we create the image, we will then push an image that is ready for containerization to my docker hub account where it can be accessed by anyone using docker compose instructions, to deploy the website on a docker container using Portainer or just using docker commands.
To follow along, please download the website from our git repository using the commands below. First, check if git is installed on your computer by using the code:
devasc@labvm:/$ git --version
git version 2.25.1
If git is not installed on your computer. Use the following code to install git.
sudo apt-get install giton the contrary, if git is installed, download the website in a directory called myapp using these steps.
Step 1 create a directory named my app and navigate tom it
mkdir myapp && cd myappStep 2 : Download the website from git repository using the command below
https://github.com/f2ka07/portainer-dockerfile-example.gitStep 3. Rename the website directory to myapp so that your instructions are consistent with our guide.
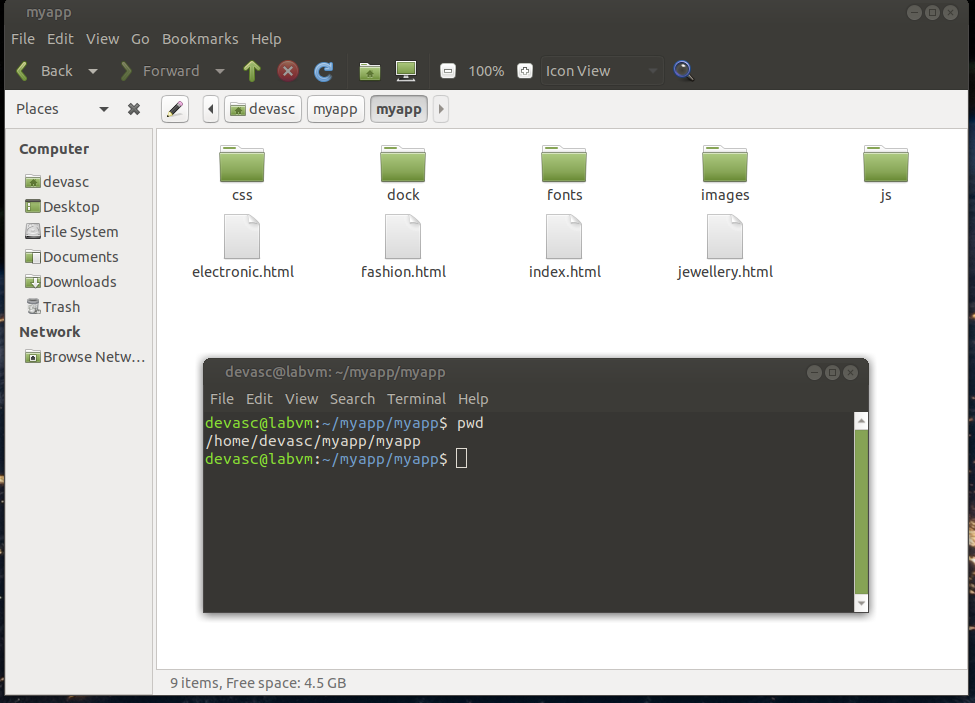
mv portainer-dockerfile-example myappAfter that, you should have two directories called my app. See the image below:
Creating the Portainer Dockerfile for the website #
The following code converts the static website above into a docker image ready for containerization.
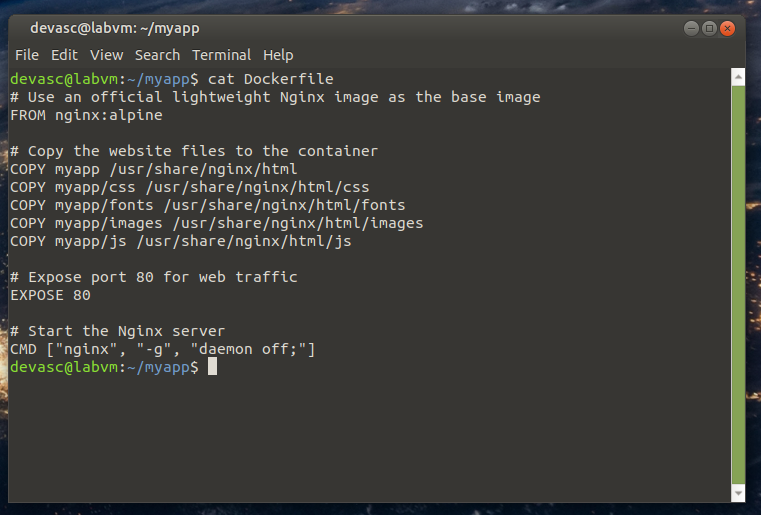
# Use an official lightweight Nginx image as the base image
FROM nginx:alpine

# Copy the website files to the container
COPY myapp /usr/share/nginx/html
COPY myapp/css /usr/share/nginx/html/css
COPY myapp/fonts /usr/share/nginx/html/fonts
COPY myapp/images /usr/share/nginx/html/images
COPY myapp/js /usr/share/nginx/html/js

# Expose port 80 for web traffic
EXPOSE 80

# Start the Nginx server
CMD ["nginx", "-g", "daemon off;"]
Copy the dockerfile instructions above and paste to put them in a file name Dockerfile inside your website directory. The file should have no extension at the end. You should navigate to your first myapp directory.
devasc@labvm:~/myapp$ ls
myapp
devasc@labvm:~/myapp$ sudo nano Dockerfile
Paste the instruction in the previous section in nano window then press 1) ctrl o 2) enter then 3) ctrl x
When you run cat on your terminal, you should see the content of your docker file:
Now you are ready to run the Dockerfile by executing the following command:
sudo docker build -t portainer-dockerfile-example -f Dockerfile .Expected output
devasc@labvm:~/myapp$ sudo docker build -t portainer-dockerfile-example -f Dockerfile .
Sending build context to Docker daemon  12.56MB
Step 1/4 : FROM nginx:alpine
 ---> c433c51bbd66
Step 2/4 : COPY myapp /usr/share/nginx/html
 ---> eb4d05a2e614
Step 3/4 : EXPOSE 80
 ---> Running in b25e4e0e75b5
Removing intermediate container b25e4e0e75b5
 ---> 59021d0be95e
Step 4/4 : CMD ["nginx", "-g", "daemon off;"]
 ---> Running in 40779312072b
Removing intermediate container 40779312072b
 ---> be4d3fefb809
Successfully built be4d3fefb809
Successfully tagged portainer-dockerfile-example:latest
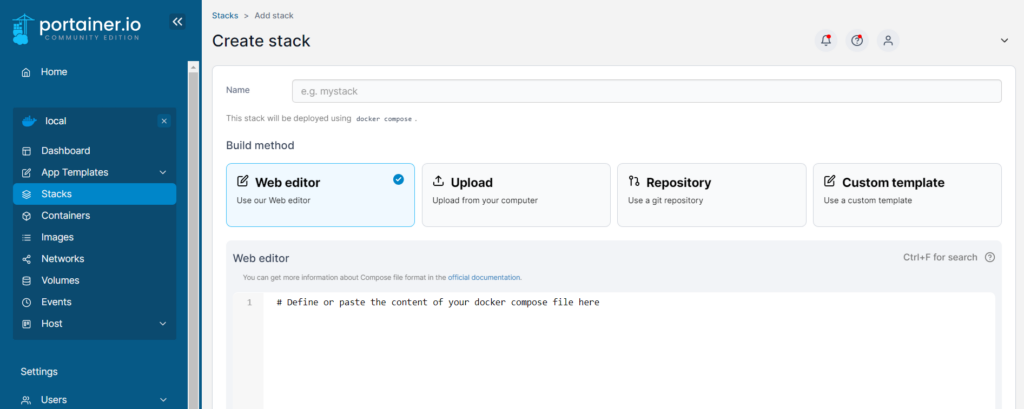
Now that we have the image created. We can use it in Portainer in the following ways: You need to go to stacks , then create a stack to get the four options below.
How to use the Web Editor to Create a Container in Portainer #
When using the web editor method in Portainer, you will be able to create a container by defining the instructions for the container using a text editor within the Portainer web interface. The instructions will be in the form of a docker-compose.yml file. This file will contain the configuration for the container, such as the image to use, the environment variables to set, and the ports to expose.
This means that the image should be available on Docker hub. Lets push the image we have just created to Docker hub.

First, we need to log in to Docker hub image registry. On Linux, you can use the docker login command. This command will prompt you for your Docker ID and password. Once you have entered your credentials, the command will log you in to the Docker registry. Here is an example of how you can use the command:
docker loginHere is the output
devasc@labvm:~$ docker login
Login with your Docker ID to push and pull images from Docker Hub. If you don't have a Docker ID, head over to https://hub.docker.com to create one.
Username:
Password:
WARNING! Your password will be stored unencrypted in /home/devasc/.docker/config.json.
Configure a credential helper to remove this warning. See
https://docs.docker.com/engine/reference/commandline/login/#credentials-store

Login Succeeded
Once you are logged on, you can push the image to docker hub using the following steps:
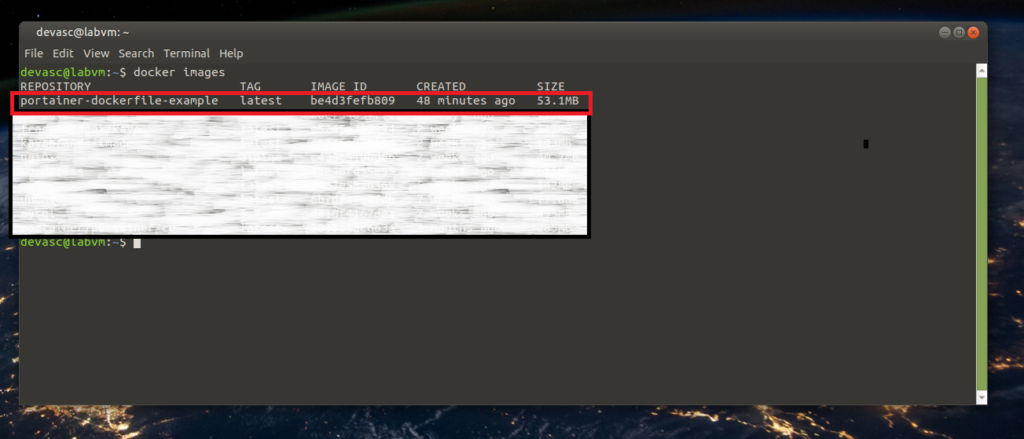
In order to push an image to a remote repository, you first need to create and tag the image on your local machine using the docker build command. You should make sure that the image has been created and tagged correctly before trying to push it. Check the image name with
docker imagesFor example, after building the image, you can use the following command to check if the image exist
Tag the image as shown below. Remember to replace myusername with your docker hub username. To tag an image called “portainer-dockerfile-example” with the tag “latest” to your account on Docker Hub, the command would be:
docker tag portainer-dockerfile-example portainer24/portainer-dockerfile-example:latest
Once you have tagged the image, you can use the docker push command to push the image to the remote repository. To push the image we have just tagged to my account on Docker Hub, the command would be:
docker push portainer24/portainer-dockerfile-example:latest
The following is the output of the above code
devasc@labvm:~$ docker push portainer24/portainer-dockerfile-example:latest
The push refers to repository [docker.io/portainer24/portainer-dockerfile-example]
0ab60a902b7a: Pushed
1d886466c455: Mounted from library/nginx
2348e9726bab: Mounted from library/nginx
a565521a6b61: Mounted from library/nginx
fc9a7040ee93: Mounted from library/nginx
c700d3f5f15b: Mounted from library/nginx
e75b8fc6a0d5: Mounted from library/nginx
8e012198eea1: Mounted from library/nginx
latest: digest: sha256:2edd63bd8425c38c021ecb23b99238d6882ed40aae6111999ebf5d59ca3ad5ba size: 199
After this, you just need to create a docker compose file to create a container using Portainer web editor option. The docker compose file should be as follows:
version: '3'
services:
  website:
    image: portainer24/portainer-dockerfile-example
    restart: always
    ports:
      - 8080:80
    volumes:
      - myapp:/usr/share/nginx/html/
volumes:
  myapp:
Here is the docker compose file in portainer.
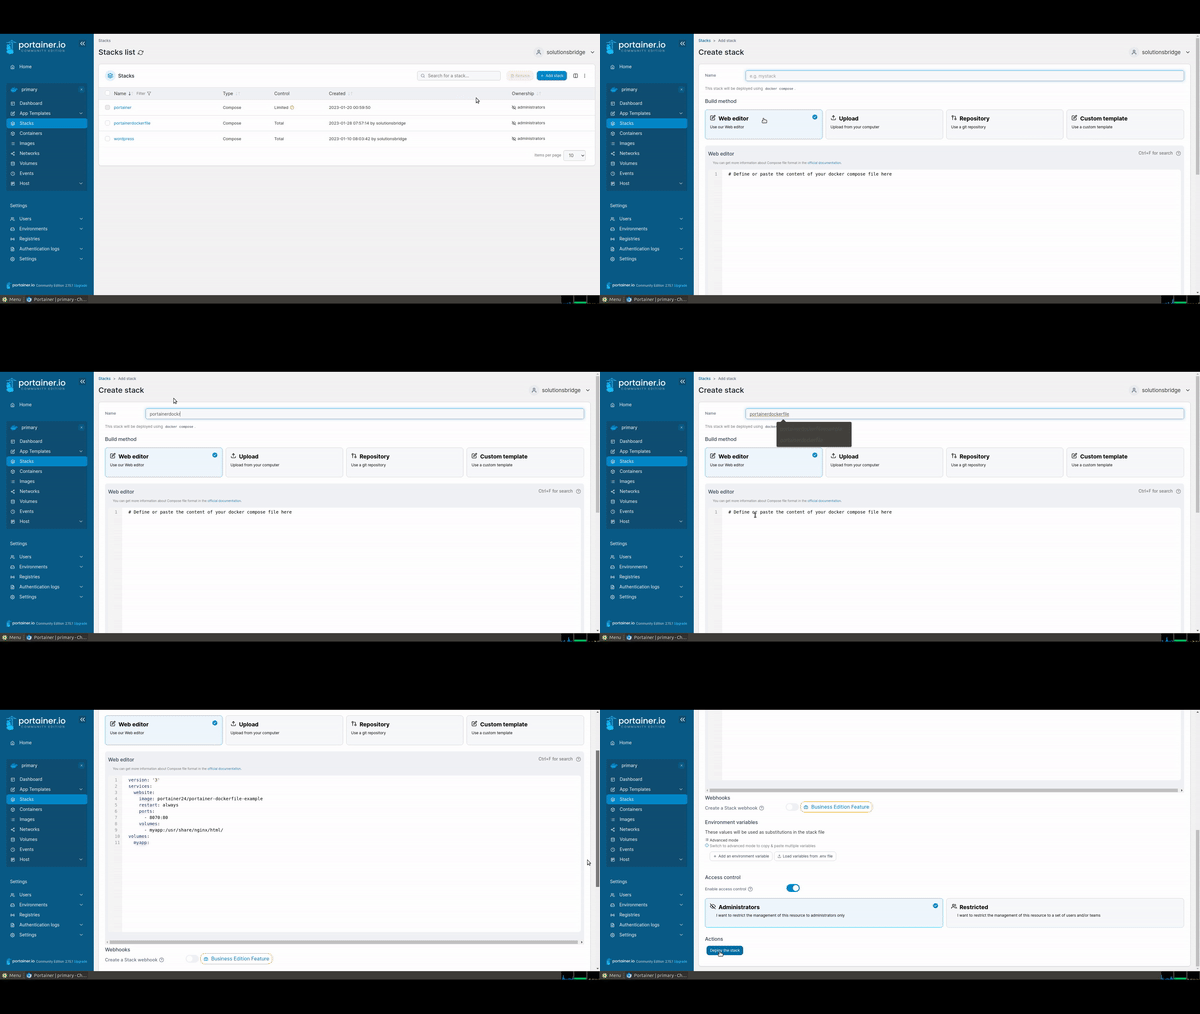
After you deploy, you will have your container and images and you can run the website by going to port 8080. See my website here running on port 8080. You can also access the website on your network by using the IP address of the container and port 8080.
http://127.0.0.1:8080Final Website

Upload Dockerfile from your computer to Portainer #
Upload from your computer: This method allows you to create a container by uploading a file from your computer. This file should be a docker-compose.yml file, which contains the instructions for the container, just like the web editor method. The instructions should be the same as above. Once the file is uploaded, Portainer will create the container based on the instructions in the file.
Dockerfile in Git Repository to Create a Container in Portainer #
Using a git Repository: This method allows you to create a container by using instructions that are stored in a git repository. The repository should contain the docker-compose.yml file which contains the instructions for the container. Once you provide the git repository URL, Portainer will clone the repository, and use the instructions in the docker-compose.yml file to create the container.
Using a Custom Template to Create a Container in Portainer #
Using a custom template: This method allows you to create a container using a pre-made template. The template is usually a docker-compose.yml file, which contains the instructions for the container. The instructions are already written and the template will have placeholders that you will have to fill in like the name and image of the container. Once the template is filled in, Portainer will create the container based on the instructions in the template.


